Difference between revisions of "Your First Visit"
(→Linking to your age: ULM is offline and dead) |
m (Fix metadata.) |
||
| Line 1: | Line 1: | ||
| + | {{Tutorial}} | ||
| + | |||
== Landing Zone == | == Landing Zone == | ||
| Line 59: | Line 61: | ||
It's time for [[Giving It Substance]], before we lighten it up a little better... | It's time for [[Giving It Substance]], before we lighten it up a little better... | ||
| − | [[Category: | + | [[Category:PyPRP]] |
Latest revision as of 09:34, 4 March 2020
| This is a tutorial page. |
Contents
Landing Zone
PLEASE NOTE: If you are using plugin version 1.2.1 or later, you will need to skip this part of the tutorial, as your Age will not export correctly. Scroll down to the bottom of this tutorial and click on the link that says Giving It Substance first. Once you are done with the next tutorial, come back to this one and THEN do this. We're sorry for the confusion that this may have caused anyone. ''
Hmm, now - if we were to just blindly link to the Age, where would we end up? Probably that would be the center of the earth - or in this case, the center (origin) of the world. That would not be the best location, so we'd better change that.
We can change this by adding a spawn point.
A spawn point is a named location in the Age, where Uru will send us.
Every Age has at least one spawn point called "LinkInPointDefault" - a.k.a. the default point to link to.
To add a spawn point, we will start by placing the 3D cursor right on the spot where we want to link in. Well, make it a small bit higher, to be on the safe side.
Now go to the Scripts window and press Scripts->Add->PyPRP->Create a New SpawnPoint
Look at your Age, and be amazed not to find a spawn point....
The spawn point has been added in layer 2 of your scene. Hold SHIFT and press the buttons for layers 1 and 2, to make both your island and the spawn point visible.
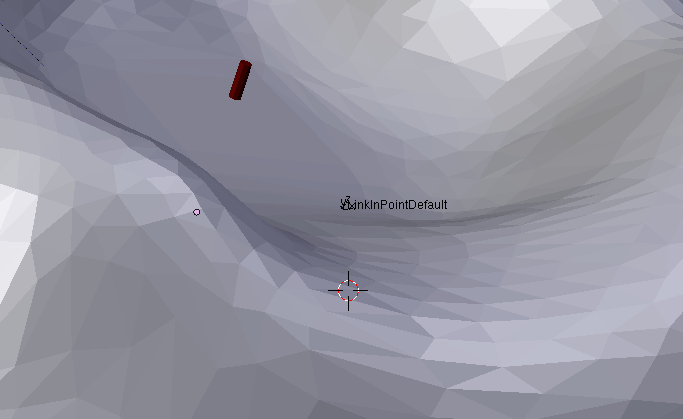
Now it should look a bit like this:

Notice how the spawnpoint has already been named LinkInPointDefault, so that saves us the trouble of renaming it.
Saving and Exporting
If you're like me and don't want to spend too much time copying the resulting files of your Ages, you're probably going to save your blend file in the [Your Uru base folder]\dat directory.
Save the file from the main menu File->Save As...., and store it as "Tutorial.blend" in the ...\dat folder.
To export the Age, go to the main menu, and do File->Export->PyPRP In the popup menu that follows, select Generate Release (.age).
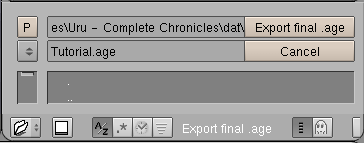
Following this step, one of your windows - probably the scripts window - will be changed to a file selection window, where you can choose to which file name you want to export (the file name should always end with .age).

You can safely leave the "Tutorial.age" as it is, and press the Export final .age button.
The plugin will be busy for a few seconds, and your Age will be done afterwards.
- Note:
- If you did not save your blend file in the [Your Uru base folder]\dat directory, you'll have to copy the resulting Uru files (extensions .age,.prp,.sum and .fni) there manually.
Linking to your age
First install the Offline KI if you did not already do so. It will automatically find your age the next time you start Uru and add it to the end of the "Restoration Links" in Nexus. As an even quicker way to test your age, use the KI command "/link agefilename".
First view of the age
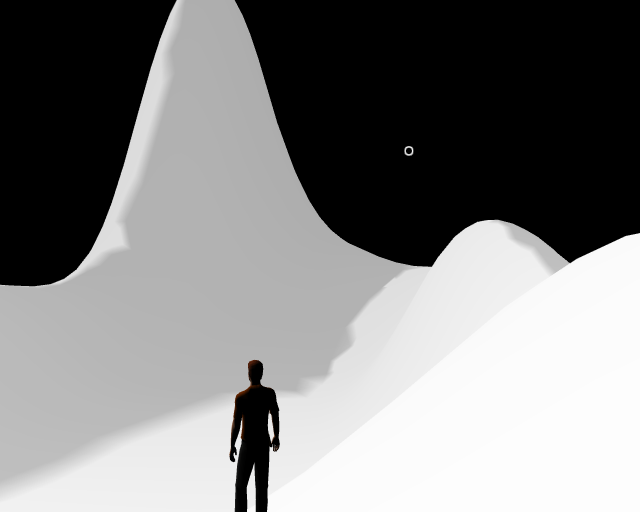
You Age will probably look like this:

Ok, it looks a bit like an iceberg in space, but it's still your first Age, be proud of it!
Just walk around for a while, don't fall off any cliffs, and link back when you've had a good view.
Continue
Now that you've finally seen your age for the first time, it's time to spice it up a little, after all, icebergs in space are only exciting if they burn up in the atmosphere...
It's time for Giving It Substance, before we lighten it up a little better...
