Difference between revisions of "Clickable Books"
m |
m (Fix metadata.) |
||
| Line 55: | Line 55: | ||
Onwards! | Onwards! | ||
| − | [[Category:Blender | + | [[Category:Blender Tutorials]] |
Latest revision as of 08:32, 4 March 2020
![]() This page is a stub. You can help us by expanding it.
This page is a stub. You can help us by expanding it.
note: this is a work in progress, follow at your own risk. currently, this only details making and texturing a book mesh- the detail on how to make the book work is coming.
It is easy to create Journals and Linking Books for your ages with the Dynamic Book Template scripts by D'Lanor. For them to work, you'll need a few things:
     - A book mesh
     - A logic region around the mesh
     - Some AlcScript
     - Some python code
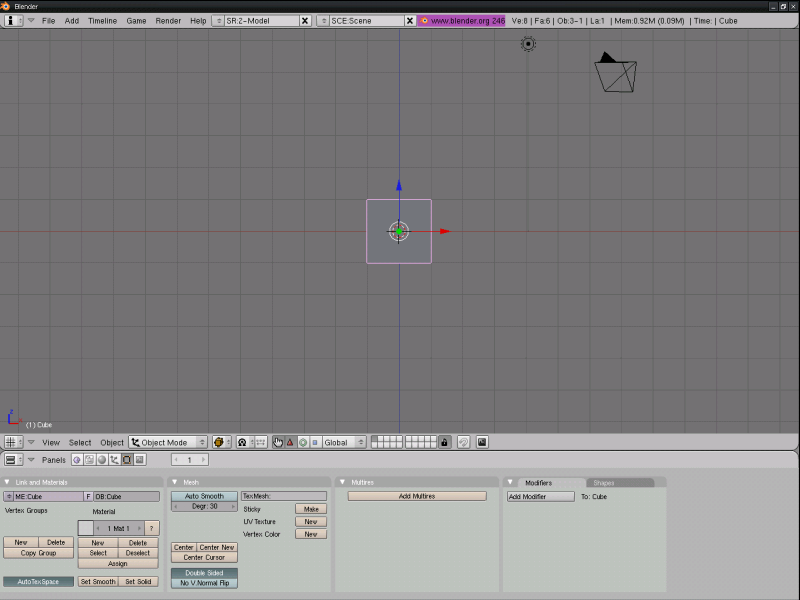
If you don't know what these things are or how to create them, don't panic, all will be explained in this tutorial. Fire up Blender, and open the .blend file of the age you want to add a book to. Before we start to add stuff, the layout needs to go from this:
to this:
Note: If you know your way around blender and can create and texture a book mesh by yourself, skip straight onto step two.
Step one:
For the purposes of this tutorial (and your sanity), we're not going to create a very detailed book mesh. Select the default cube and go into edit mode. Press S, then Z, .1 and finally enter to flatten the cube into a shape somewhat like a closed book. However, go into top view (Numpad 7), and the cube is square at the top! This doesn't look like a conventional book (not a bad thing, per se...), so we'd better make one more adjustment. Press S, Y, 1.2 and then enter to stretch the cube into a rectangle.
Now that your book looks like a book, it only needs one thing: textures! UV mapping is difficult, but luckily, the book is a simple object to texture. Now, the most recent version of blender merged edit mode and UV mapping mode into one window, so the process is slightly different depending on which version you are using.
If you're using blender 2.46 (a picture of a bunny appears on startup), press U while in edit mode to bring up the UV editing menu. Select all faces of the object (press the A key until they all turn a purple colour), press the U key, select 'Unwrap (smart projections)' (hint: it's at the bottom of the menu), and press 'OK' on the menu that pops up.
If you're using some version of Blender prior to 2.46 (some other picure appears on startup), go out of edit mode and into UV editing mode using the menu down the bottom. Make sure all faces are selected by pressing the A key until they all go white, press the U key, select 'Unwrap (smart projections)' (hint: it's at the bottom of the menu), and press 'OK' on the menu that pops up.
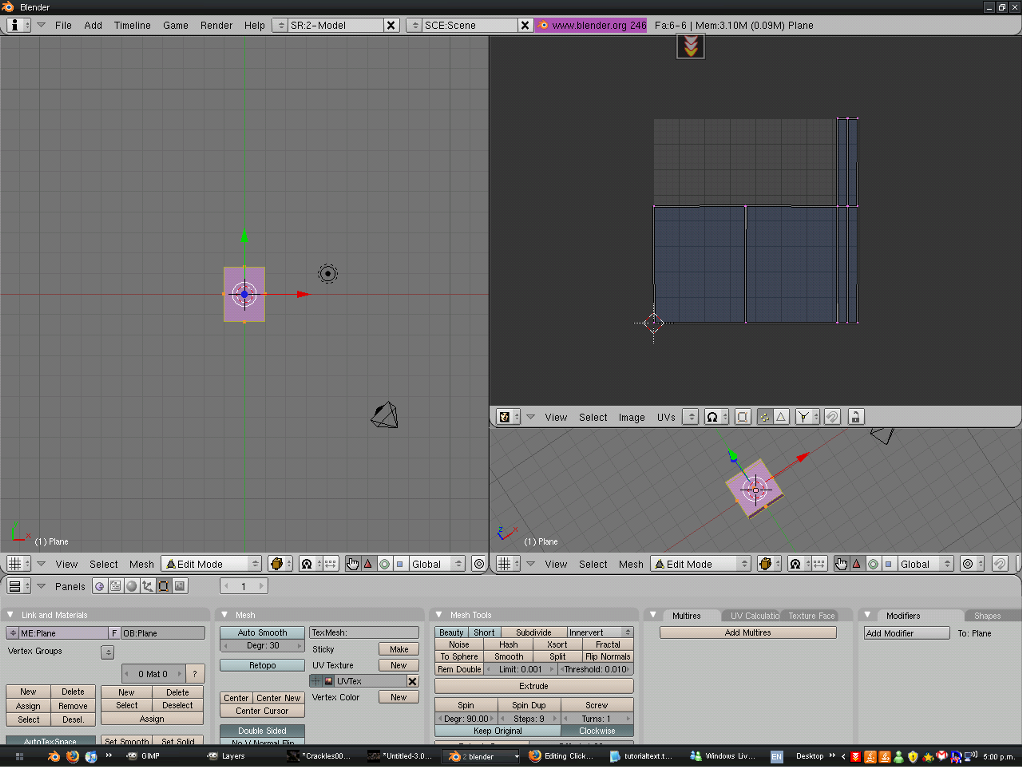
Did you notice that an image made up of joined together rectangles appeared in the UV mapping/image window (it's the one you made, up on the top right section of the screen)? These rectangles represent the faces of your book after being peeled off and flattened onto a plane. If you've done this step correctly, the UV window should look like this:
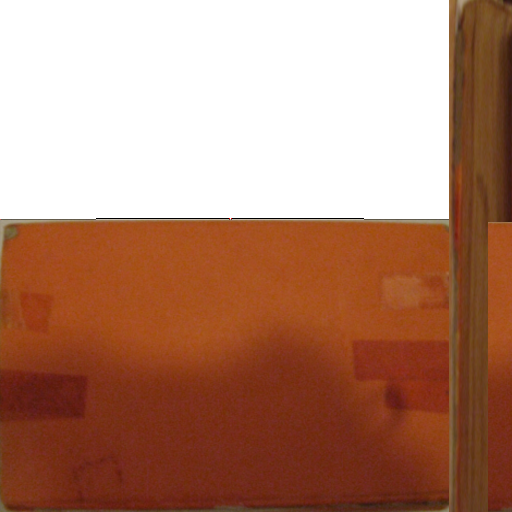
Now that the cube has been unwapped, you can stick a texture onto it. To be able to see the texture on the object in blender, you'll need to change into Texture view mode. To do this, press Alt and Z. You're now ready to start texturing! Start by downloading this texture I made earlier:
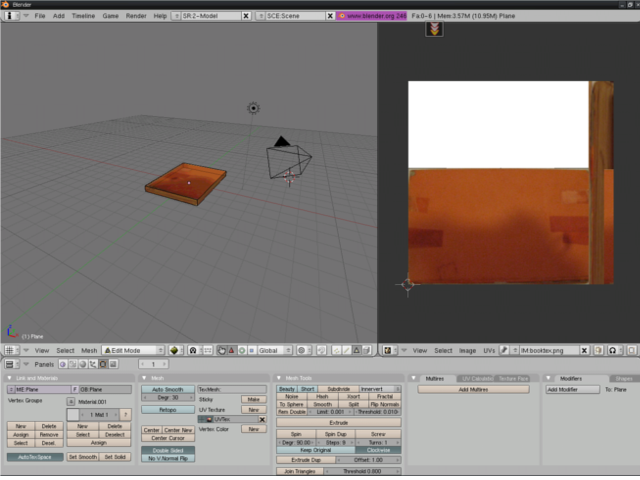
(if you were wondering, the book I used was 'A Word Child' by Iris Murdoch. Thanks Iris!) Make sure you are in edit mode, click the word Image down the bottom of the UV panel, and chooose open. Navigate to the texture you downloaded two seconds ago, click it, and then click OK. Finally, move your cursor into the 3d view (with the book) and press Alt N to recalculate normals outside. This means that the texture is pointing outwards on all the faces, ensuring that you cann see the texture in-game. If your screen now looks similar to this:
then you've done well. if it doesn't, try again- the first rule of age building is practise makes perfect, closely followed by save often.
The texture won't show up in Uru unless you make some changes to the material on the book as well. With the book selected, click the grey circle in the buttons window and press add new. Then press the button that looks like a lepoard skin (or a cheese, take your pick) and then click on add new.
Click the button that says 'None' and choose 'Image' on the menu. Click the little arrow beside load, and choose the book texture. Now click on the little circle again, and go to map input. Choose UV.
Right, you now have a gorgeous, low-poly book model ready to use in any age of your choice. However, it's missing one thing- functionality! In the following sections, you'll learn how to edit python code (understanding of programming not required, don't worry) and create regions.
Onwards!


