Wavesets
Contents
Introduction
Wavesets are the classes that Cyan uses to create their standing water effects. When you see a pool of rippling, shiny, water, you are looking at a waveset, or more specifically, a mesh being modified by a waveset. Wavesets take a enormous number of parameters, which can make them seem daunting at first, but you should be able to get something reasonable simply by using the plugin's default settings. I will start this tutorial by walking you through the creation of a simple waveset, and then going on to explain some of the more common parameters. Also, keep in mind that we do not, in fact, know what every single one of the parameters actually does, so if we can't answer your questions, try experimenting on your own, and reporting your findings.
Also, as a prerequisite for Wavesets, Dynamic Environment Maps have been implemented in PyPRP. Dynamic EnvMaps are rendered by the game when you play, so they don't have to be pre-rendered in blender and saved. To use a dynamic envmap, simply leave the envmap texture layer setting at "static" or "anim", rather than selecting "load" and loading a texture.
IMPORTANT NOTE: Not everyone will be able to see wavesets, because they require certain graphics card and driver features. Older cards/drivers may simply not draw the waveset, the entire age, or crash entirely.
Recent investigation indicates that using geostate settings solves this problem, provided that the older graphics card is capable of displaying wavesets in most of Cyan's ages. (Note to developers: geostate defaults should not be 0)
Setting up a waveset
The first thing you need to know about wavesets is that the geometry doesn't quite look like you think it does. The actual mesh in the file conforms to the bottom of the pool, or the seafloor, and at run-time the mesh is flattened to a specific z-height, and then rendered. This is the "WaterHeight" and PyPRP will assume this to be the Z coordinate of the object center. At this point, it is good to know that you can change the center of an object by placing the 3D cursor somewhere, and, with the object selected, choose Object > Transform > Center Cursor from the menu. The object center will also be the location from which the dynamic environment map is rendered.
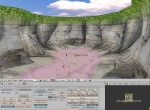
To begin, we'll start with a classic "Hole in the Ground" age with a little depression in the middle for our pool.
To get the geometry for our waveset, we will select the bottom of the pool, duplicate it, (Shift-D) and part (P) it from the object. Then we'll leave edit mode, select the waveset, rename it, and change it's material.
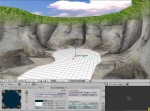
Make sure the material is not linked. (press the number next to the material name and click "single user") and then remove all the texture layers. Change the "Col" color to the color you want your water to appear when there is nothing reflected off of it. Generally this is a very dark blue or green. Then, delete the old UV coordinates and press new to create a new blank UV layer.
Finally, we'll add an alcscript to make the plugin export this object as a waveset:
<object name>:
    type: waveset
before you export, there are two other things it would probably be good to do. The "envradius" parameter is used to approximate reflections of objects closer than infinity in an envmap. This is done by setting a fixed radius, and rendering as though the objects were being reflected off of a sphere of that size around the center point. This means you should set the envradius parameter to the distance from the center of the object to the first visible object that you want to see reflected properly. Also, you will probably want to change the depthfalloff. In this case, I had a very shallow waveset, with the object center at z=0 and the lowest vertex at about -0.57, so I've set the bottom component of the depthfalloff opacity param to 0.5 To set parameters for wavesets, simply add them to the waveset dict:
<object name>:
    type: waveset
    visual:
        waveset:
            envradius: 100
            depthrange:
                opac:
                    start: 0
                    end: 0.5
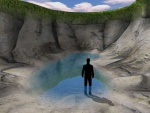
Using these settings on this age resulted in something like the image on the left. It is important to note that if you have more than one waveset, or any other object, they should not share materials, as this will cause the first waveset modifier to affect all objects sharing that material.
The Parameters
If you want to play with these, it helps to understand how wavesets actually work, and to do that, it is recommended that you read this article in GPU Gems, written by Mark Finch, the same person that implemented these in plasma. This is an example alcscript showing all of the currently editable parameters (Note: in the nightly build the params have been changed and are now under visual.waveset instead of just waveset):
<object>:
    visual:
        waveset:
            shores:
                - <scnobjref>
            decals:
                - <scnobjref>
            envmap: <envmapref>
            geostate:
                maxlen: 6.25
                minlen: 6.0
                ampoverlen: 0.001
                chop: 0.0
                angledev: 1
            texstate:
                maxlen: 6.25
                minlen: 0.78
                ampoverlen: 0.01
                chop: 0.5
                angledev: 1
            ripplescale: 100
            specnoise: 0.5
            specstart: 250
            specend: 1000
            depthrange:
                opac:
                    start: 0
                    end: 0.5
                refl:
                    start: 0
                    end: 1
                wave:
                    start: 0
                    end: 1
            wispiness: 0.5
            edgeopac: 1
            edgeradius: 1
            period: 1
            fingerlength: 1
            envrefresh: 3
            envradius: 1000
            winddir: <object>
            windspeed: 0.1
Changing the wind direction
Create an empty object and name it whatever you want. Remember the name. Now, rotate it, keeping the Z axis pointing up (as it should have been when you created it) so that the Y axis points in the direction you want the wind to be blowing.
Next, add a script to reference that object, and supply a windspeed. (0.1 is a good starting value):
    <object>:
        visual:
            waveset:
                winddir: <name of empty object>
                windspeed: 0.1
Shores
One of the more "advanced" features of the waveset is the "shore" which is an object referenced by the waveset. The referenced object becomes an animated rolling wave texture.
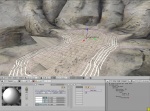
To set up our shores, we will duplicate the outermost strip of the waveset object, and flatten it at the waterheight. (place the cursor at the waterheight, set the transform mode to cursor, press S, Z, 0, Enter) Then we extend the uv map so it shows about one length per edge polygon using this dummy texture. Finally, we reference it in the shores alcscript. As with the rest of your materials, you should make sure it does not cast shadows by disabling the "Shadbuf" button in the material panel.
<object name>:
    visual:
        waveset:
            shores:
                - <scnobjname>
                - <scnobjname>


