
Difference between revisions of "Max:Detail Textures"
m (moved Using The Details Feature to Max:Details) |
|||
| Line 1: | Line 1: | ||
| − | {{ | + | {{Tutorial|Details}} |
| + | Details allow you to maintain a consistent quality of textures no matter the distance between an avatar and the object with this feature enabled. | ||
| − | + | == Prerequisites == | |
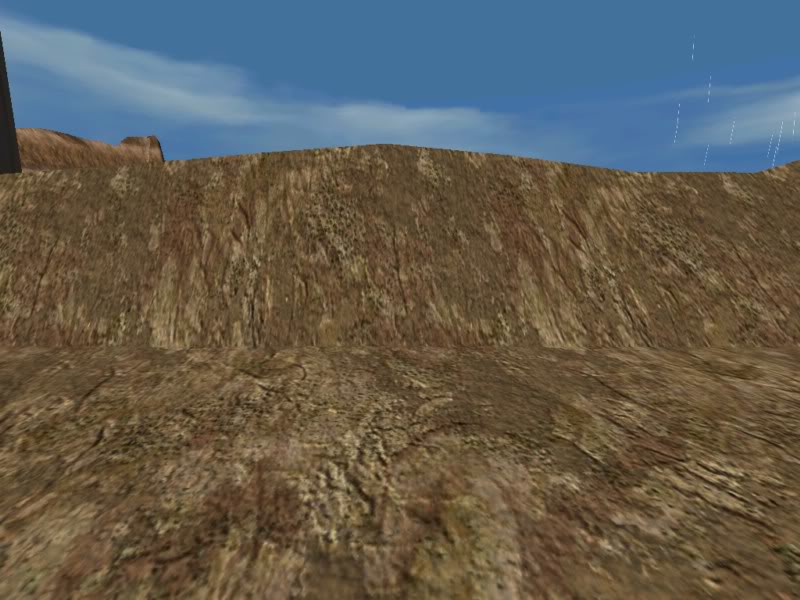
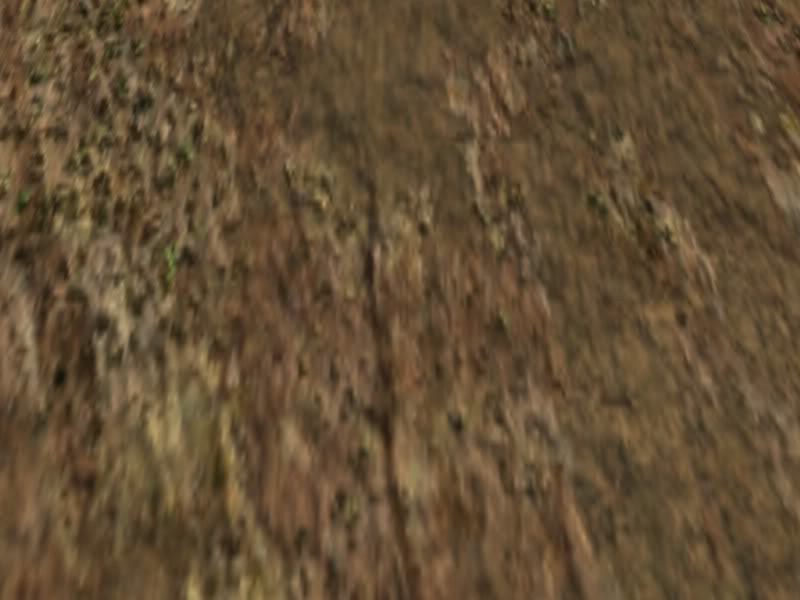
| + | [[File:MaxDetails01.jpg|thumb|left|180px|Details in Er'cana.]][[File:MaxDetails02.jpg|thumb|right|180px|Details in The Cleft.]]To be able to visualize what this tutorial allows you to do, it is assumed you have observed various Ages of Uru, such as Er'cana, in which, no matter the distance between the player and an object, said object always looks optimally textured, as pictured here to the sides. As you can see with Cyan's work, the detail of the textures adjusts to match the distance. | ||
| − | + | If you do not use details for your textures, you'll quickly realize that your UV-mapped textures may look [[Media:KIimage0018.jpg|fine from a distance]], but [[Media:KIimage0019.jpg|blurry and low-resolution]] when closer. On the other hand, if you choose an extremely high-resolution texture and apply it to your object so that it looks good, you'll run into the opposite problem, which is a tiled aspect to all your textures from a distance. Details are the solution to these problems. | |
| − | + | === Tutorials === | |
| + | You'll need to be familiar with materials before applying the details techniques. | ||
| + | * [[Max:Getting Started]] | ||
| + | * [[Max:Materials]] | ||
| − | [[ | + | == Getting Started == |
| + | The principle behind details is that you UV map two different textures to your objects: one that looks good from afar, and that looks good up close, each with different resolution levels. The latter is the top texture and has an alpha channel which changes from complete transparency when looking at it from a far to complete opaqueness as the player gets closer. | ||
| + | # [[Media:Details1.jpg|Apply your base layer]] as usual. Use Plasma Standard as your material, and make your base layer the texture that the player will see from a distance; make sure it [[Media:Details2.jpg|looks good from afar]]. | ||
| + | # Go to the Top Layer by checking its box to apply a new texture (preferably a different one). It needs to have an alpha channel in it (transparency). | ||
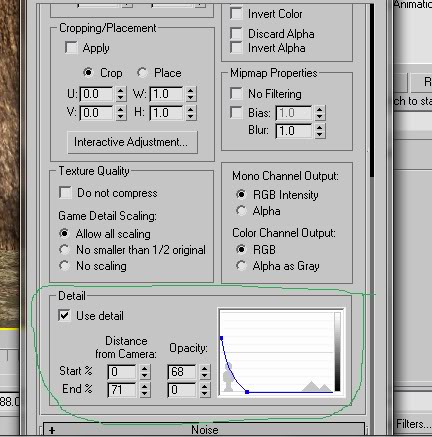
| + | # Scroll down in that layer until you come the box named "[[Media:Details3.jpg|Details]]" and put a check mark next to "Use detail". | ||
| + | # In the box depicting a person standing on one side and mountains on the other, you can observe a blue line representing the transparency of an object in relation to its distance from the player ([[Media:Details3.jpg|example values]] which may need to be adjusted depending on the situation). | ||
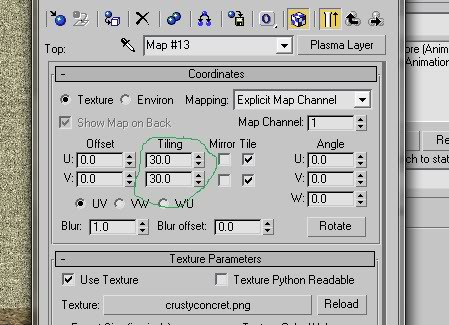
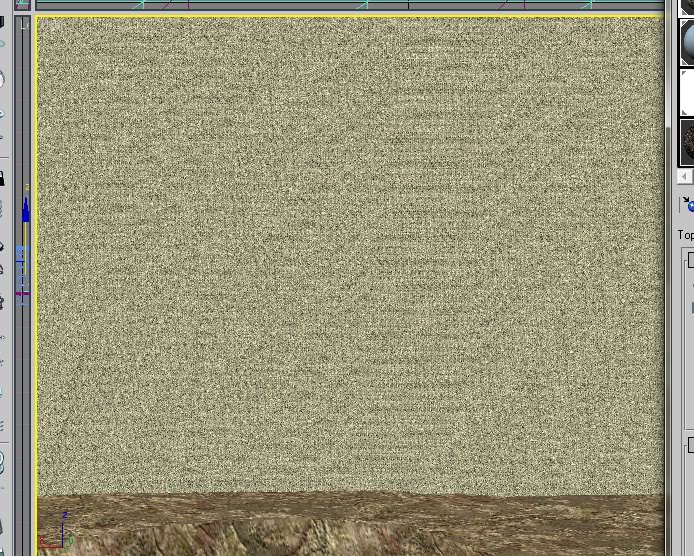
| + | # Scroll up to the "Coordinates" box and adjust the numbers for UV tiling so that the texture is very tiled (using the UV Editor instead will mess up the first texture's UV mapping). Here are [[Media:Details4.jpg|some values]] you can play with depending on your texture ([[Media:Details5.jpg|result for this texture]]). This is because the texture needs to look good when the player is close to the object. | ||
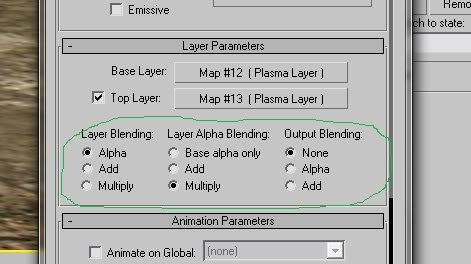
| + | # Go back to the Material box and set the blending ([[Media:Details6.jpg|possible options]]; the first needs to be set to Alpha, and it is recommended to use None for the third one). | ||
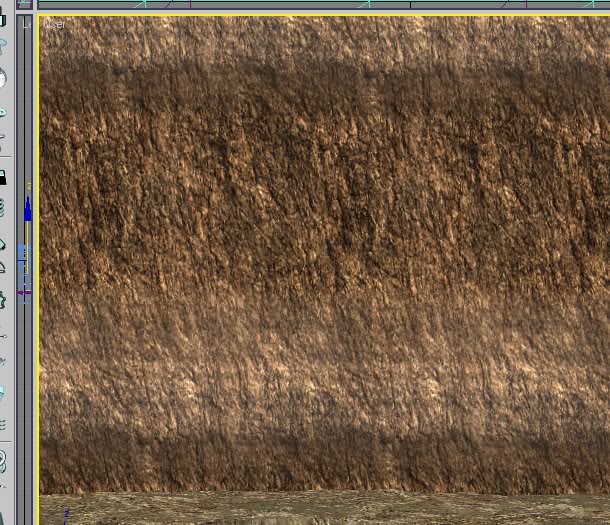
| + | You should now export and test until you're satisfied with the result. In this case, the end result is pictured below. | ||
| − | [[File: | + | [[File:DetailsEndResult.jpg|thumb|center|400px|The end result for this tutorial's example.]] |
| − | + | ||
| − | + | ||
| − | + | ||
| − | + | ||
| − | + | ||
| − | + | ||
| − | + | ||
| − | + | ||
| − | + | ||
| − | + | ||
| − | + | ||
| − | + | ||
| − | + | ||
| − | + | ||
| − | + | ||
| − | + | ||
| − | + | ||
| − | + | ||
| − | + | ||
| − | + | ||
| − | + | ||
| − | + | ||
| − | + | ||
| − | + | ||
| − | + | ||
| − | + | ||
| − | + | ||
| − | + | ||
| − | + | ||
| − | + | ||
| − | + | ||
| − | + | ||
| − | + | ||
| − | + | ||
| − | + | ||
| − | + | ||
| − | + | ||
| − | + | ||
| − | + | ||
| − | + | ||
| − | + | ||
| − | + | ||
| − | + | ||
| − | + | ||
| − | + | ||
| − | + | ||
| − | + | ||
| − | + | ||
| − | + | ||
| − | + | ||
| − | + | ||
| − | + | ||
| − | + | ||
| − | + | ||
| − | + | ||
| − | + | ||
| − | + | ||
| − | + | ||
| − | + | ||
| − | + | ||
| − | + | ||
| − | + | ||
| − | + | ||
| − | + | ||
| − | + | ||
| − | + | ||
| − | + | ||
| − | + | ||
| − | + | ||
| − | + | ||
| − | + | ||
| − | + | ||
| − | + | ||
| − | + | ||
| − | + | ||
| − | + | ||
| − | + | ||
| − | + | ||
| − | + | ||
| − | + | ||
| − | + | ||
Revision as of 16:49, 11 April 2012
|
|
This is a tutorial page.Versions available: PyPRP; 3ds Max; Korman. |
Details allow you to maintain a consistent quality of textures no matter the distance between an avatar and the object with this feature enabled.
Prerequisites
To be able to visualize what this tutorial allows you to do, it is assumed you have observed various Ages of Uru, such as Er'cana, in which, no matter the distance between the player and an object, said object always looks optimally textured, as pictured here to the sides. As you can see with Cyan's work, the detail of the textures adjusts to match the distance.

If you do not use details for your textures, you'll quickly realize that your UV-mapped textures may look fine from a distance, but blurry and low-resolution when closer. On the other hand, if you choose an extremely high-resolution texture and apply it to your object so that it looks good, you'll run into the opposite problem, which is a tiled aspect to all your textures from a distance. Details are the solution to these problems.
Tutorials
You'll need to be familiar with materials before applying the details techniques.
Getting Started
The principle behind details is that you UV map two different textures to your objects: one that looks good from afar, and that looks good up close, each with different resolution levels. The latter is the top texture and has an alpha channel which changes from complete transparency when looking at it from a far to complete opaqueness as the player gets closer.
- Apply your base layer as usual. Use Plasma Standard as your material, and make your base layer the texture that the player will see from a distance; make sure it looks good from afar.
- Go to the Top Layer by checking its box to apply a new texture (preferably a different one). It needs to have an alpha channel in it (transparency).
- Scroll down in that layer until you come the box named "Details" and put a check mark next to "Use detail".
- In the box depicting a person standing on one side and mountains on the other, you can observe a blue line representing the transparency of an object in relation to its distance from the player (example values which may need to be adjusted depending on the situation).
- Scroll up to the "Coordinates" box and adjust the numbers for UV tiling so that the texture is very tiled (using the UV Editor instead will mess up the first texture's UV mapping). Here are some values you can play with depending on your texture (result for this texture). This is because the texture needs to look good when the player is close to the object.
- Go back to the Material box and set the blending (possible options; the first needs to be set to Alpha, and it is recommended to use None for the third one).
You should now export and test until you're satisfied with the result. In this case, the end result is pictured below.