Difference between revisions of "Planting Some Grass"
(New page: Ok, "planting grass" is obviously a metaphor for texturing your age. In this chapter, we're going to texture the rocks, add some grass, and add sky. == UV Mapping == If you read the Ble...) |
m (Planting some grass moved to Planting Some Grass) |
(No difference)
| |
Revision as of 20:41, 19 January 2008
Ok, "planting grass" is obviously a metaphor for texturing your age.
In this chapter, we're going to texture the rocks, add some grass, and add sky.
UV Mapping
If you read the Blender Noob To Pro tutorial, you probably already know about creating textures. But you may have missed what UV Mapping is.
Basically, UV mapping is precisely assigning vertices or faces to parts of your texture.
The coordinates that a vertex gets assigned on the texture are called U and V - hence the name UV mapping.
- Note:
- In Uru, UV Coordinates are set per-vertex, while in Blender they are set per-face (meaning that a vertex can have separate UV
coordinates for each face that it's attached to).
- The plugin does accurately handle this (by duplicating vertices for each face that has different UV coordinates), so don't worry too much - but to avoid getting too many vertexes duplicated, it's always best to have similar uv coordinates for as much vertices as possible.
- Most automatic UV calculations already put uv coordinates
We're going to let blender automatically unwrap the island we just made, into nice UV coordinates.
You can start by making one Blender window a UV/Image Editor window.
After that, you can select your object (when you're in object-mode) and press [F] to switch to UV editing mode.
It's best to put the view from straight above by pressing the [7] key on your numpad. (That makes automatic mapping easier later on)
Don't forget to select all the faces by using the [A]-key.
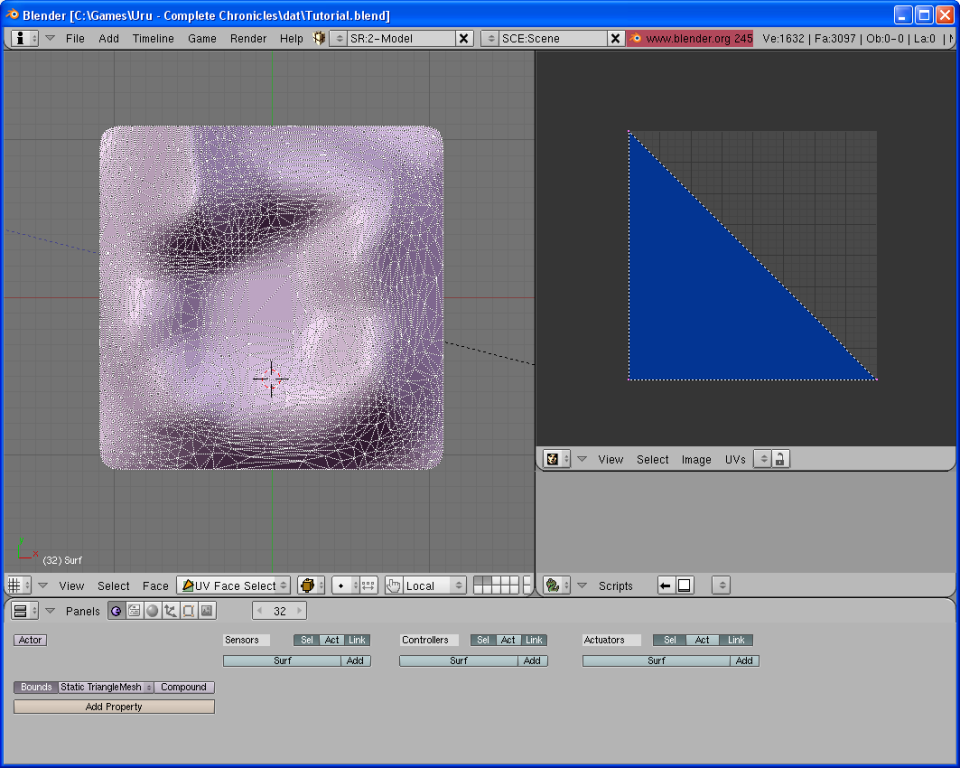
It should look like this, when you're in UV Edit mode now:

As you can see, the UV/Image Editor window, shows the UV coordinates for each selected face.
Right now, all faces use the same part of the texture - you can imagine how ugly that must look....
We're going to fix that by having blender "unwrap" the texture.
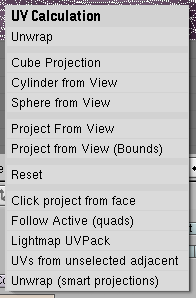
Press [U]-key on your keyboard to bring up the following pop-op menu that gives us a few options:

We are going to use Unwrap, the topmost option.
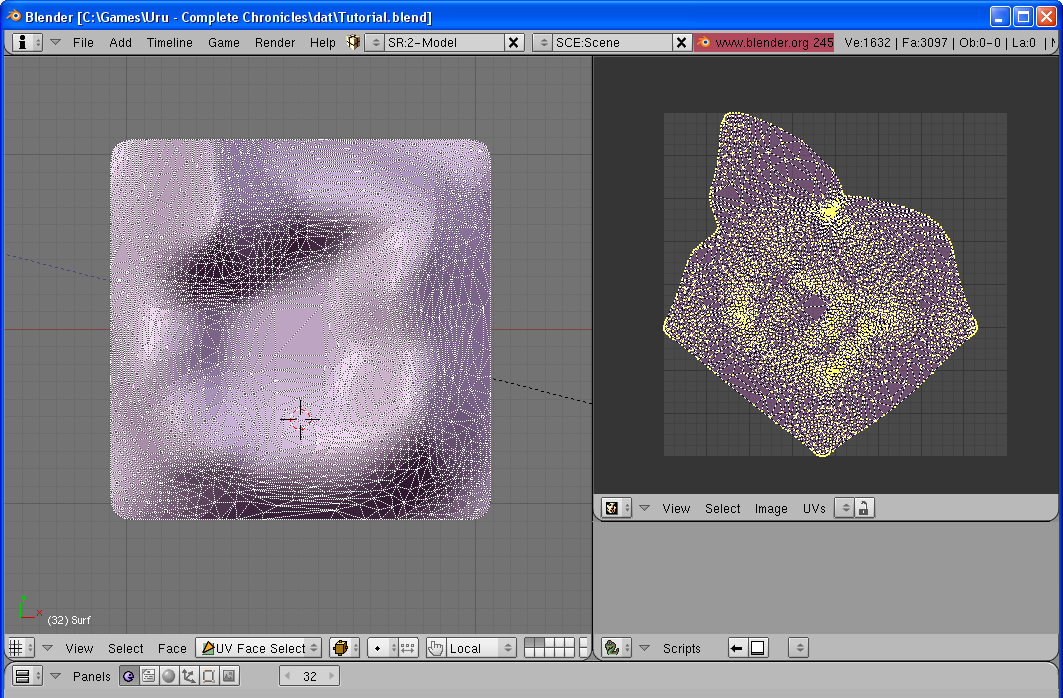
As you can see in the result below, it tries to accurately map the surface to a flat sheet of texture, but at the same time it translates the relative size of the faces correctly to texture space. (Letting larger faces have a bigger part of the texture than smaller faces)
The result if this operation is below:

It looks a bit weird, I know, but it has a texture map that is balanced to the size of the faces, and that is the most important here.
Making the island rocky
First, we are going to give the entire island a rocky material. To do this, we are going to use the following two textures:
[to be continued...]
