
Max:Lightmaps
|
|
This is a tutorial page.Versions available: PyPRP; 3ds Max; Korman. |
|
|
This article needs to be wikified. Please help us by adding relevant links, correcting formatting, or improving the article's structure. |
Light Maps are used to show light splashes (like you would see from a spot light) or for defining shadows better. You can use them just about everywhere, but keep in mind that they can bloat your texture prp. Cyan kept the number they used of these to a minimum, and limited them to interior places. For larger areas, you might want to consider using Vertex Painting to define your shadows better.
Getting Started

Making Light Maps with 3ds Max is very easy. First you will need to set up your lights that will be producing the light splashes and shadows. Directional lights work well, but you can use any Max Standard light. Don't try to use Plasma Run Time lights for these (remember, Plasma RT lights are for lighting the avatar and animated objects).
Once you have the lights set up, go to their Modification Tab. Adjust the light to your tastes.
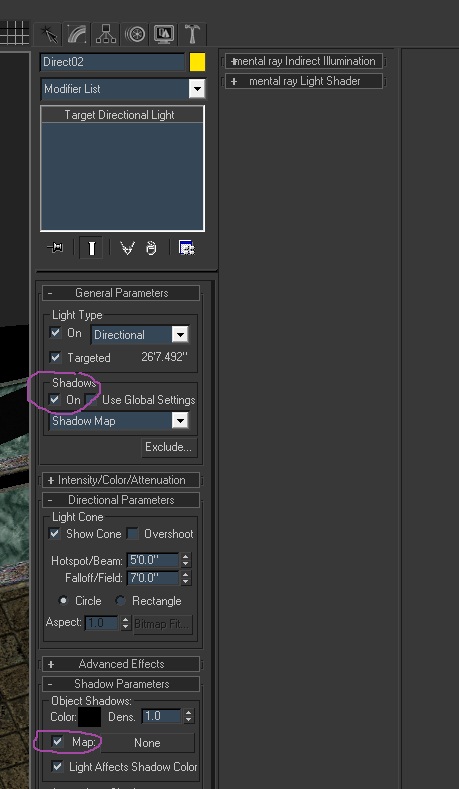
Also, further down in the rollout, you need to set the map size to the same size as the actual textures being used on the object.
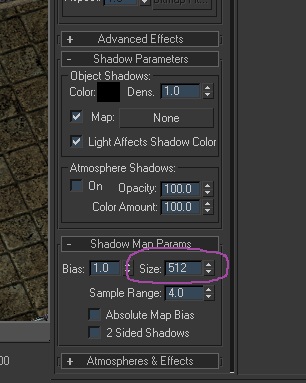
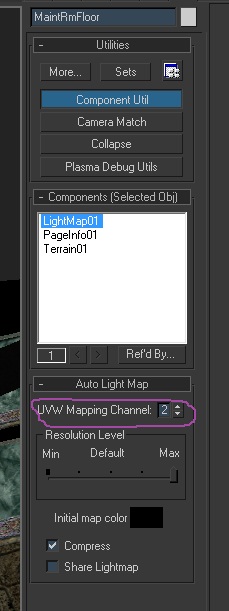
Next, select the object that the light map is going to be on (in this case it's a floor). In the Modifier Tab, add another Unwrap UVW modifier (Do not use the one you put in to UV map your texture - This will need to be a 2nd UV channel), in the rollouts, make sure you set this one to channel 2.
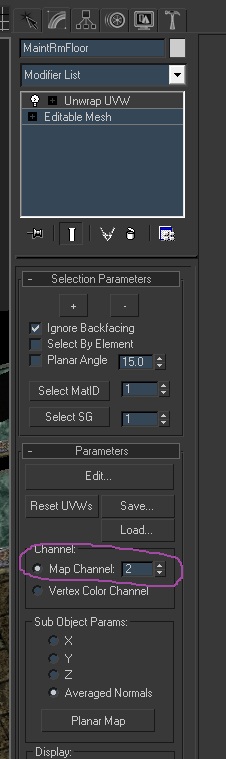
Next, open up the UV Editor and remap this 2nd channel so that all the faces lay inside the single texture tile. If the faces are outside the blue box, things will not look right.
Now call up the Component Manager and click on New > Render > Lightmap and assign it to the object.
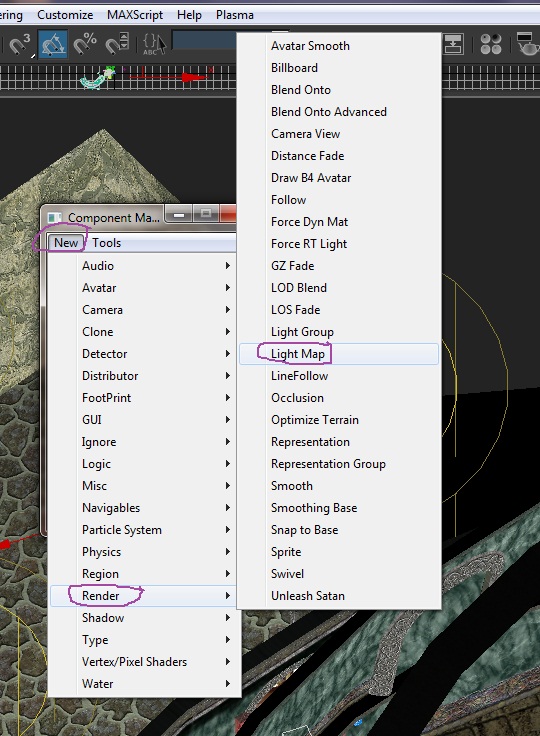
In the rollout for it, make sure you change the UVW Mapping channel to 2.
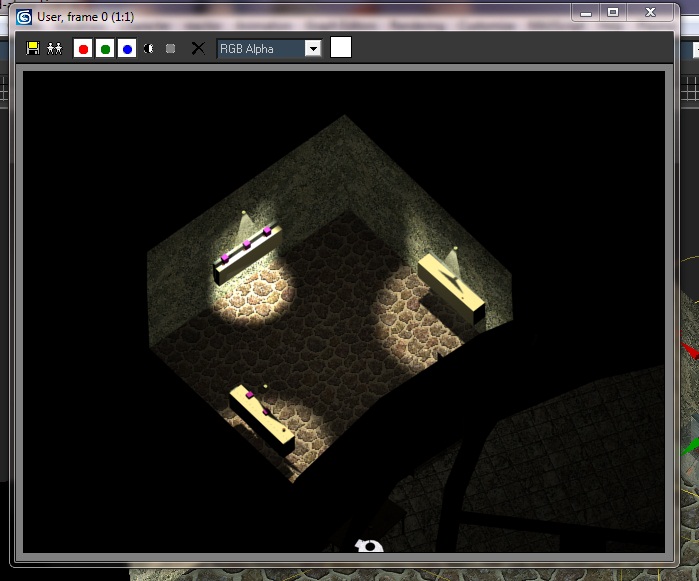
Now, if you want you can use the F10 key and do a quick render and see how it is turning out.
Once you export, you can link in your Age and see how it looks:
