
PyPRP:Getting Started
|
|
This is a tutorial page.Versions available: PyPRP; 3ds Max; Korman. |
The aim of this tutorial is to serve as an introduction to the way PyPRP works by helping you build a sample functional Age.
Alternatively, you can follow this video tutorial, presented during Mysterium 2008 live. The resulting Age file is available for download here.
- Note: this tutorial was written a long time ago; a great deal of this information might no longer be applicable, as PyPRP and Blender have both changed considerably over the years. More specifically, the section on UV Mapping was written with Blender 2.45 in mind; since Blender 2.46, no UV editing mode is available anymore; follow the appropriate instructions below.
Contents
Prerequisites
You must have read the following tutorials:
- PyPRP:Installing, since you obviously need PyPRP installed and working.
Additionally, you'll need Blender 2.49b as this is the only working version for the latest plugin; this tutorial was originally written for Blender 2.45, so some sections might require slightly different approaches today. You'll also need the Offline KI to view your Age.
Setting Up
Building an Age is a complex task; as such, you'd better make sure that you are well set up for the task.
Preparing Blender
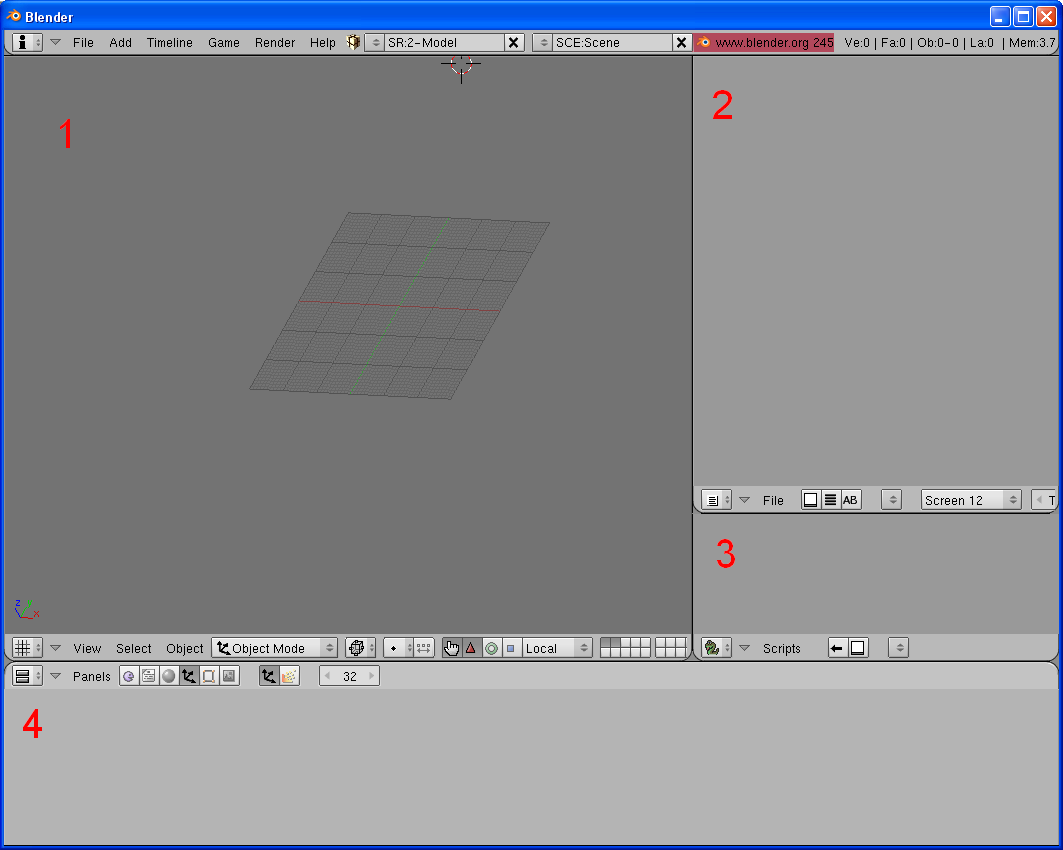
This tutorial will assume that your screen looks something like this, where 1 represents a 3D view, 2 a text editor, 3 a scripts window, and 4 a buttons window. Make sure you delete the cube loaded into Blender by default.You'll also want a reference object for scale in your Age. The unit used in Blender is the standard US Foot. So 1 unit on the grid in Blender = 1 foot in Uru (1 foot = 30.5 centimeters). As a reference, the male avatar in Uru is 6 feet high (1.80 meters) and 2 feet large (60 cm). You can easily see the scale in Blender with the grid in the 3D views. Creating a simple object with these dimensions, such as a cylinder, can be useful for reference, and you are advised to do so now. Alternatively, you can use this dummy avatar model (pictured to the right), which you can import through File -> Append or Link, navigating to the avatar.blend file, clicking on Object and finally on the DummyAvatar Object.
Adding A Book
Each needs certain information to describe the basics of how it operates. In PyPRP and Blender, this information is stored in a text file (a text file that is stored internally in Blender, to be precise). This is done by adding a Book with PyPRP:
- Go to the Scripts Window, and press Scripts -> Add -> PyPRP. Now select "Add Book" from the popup menu. This creates a default Book file.
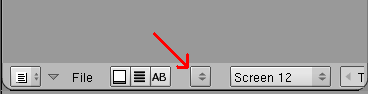
- In the text window, press the button with two arrows and select "Book" from the unveiled pop-up menu. This will display the default properties and values (as pictured to the right). Most of these are not important right now, but two are of special importance:
- age.sequenceprefix: each Age for Uru has its own unique id number called the sequence prefix. There can't be two Ages on an Uru installation sharing the same sequence prefix, otherwise Uru will just crash. You'll need to change the value for testing and distribution; to make sure your sequence prefix is unique, visit the Uru:CC Sequence Prefixes list and reserve your own number.
- age.pages: this is a list of page descriptions, each item being prepended by a dash sign and consists of at least two properties: the index, which is the number of the page, and the name, which is the name of the page. These pages are used to logically separate the content of Uru Ages, with different names. For this example, one page called mainRoom will be sufficient.
Note for future reference that the Book file's syntax follows the same structure as AlcScript, a scripting language for your Ages.
Setting Fog Settings
Fog settings are defined in
.fni files. Since the default values might not be to your taste, you should specify your own values in it. Since when you created your Book file, an .fni was also automatically created, you can open it up by selecting "init" from the text editor dropdown. The file is pictured to the left.
Scripting With AlcScript
When you created your Book, you also created an empty AlcScript file which is useful to add various advanced features to your Age. For now, you can leave it empty.
Modelling
It is of course assumed in this tutorial (as with all other tutorials on this wiki) that you are proficient with basic Blender modelling and usage.
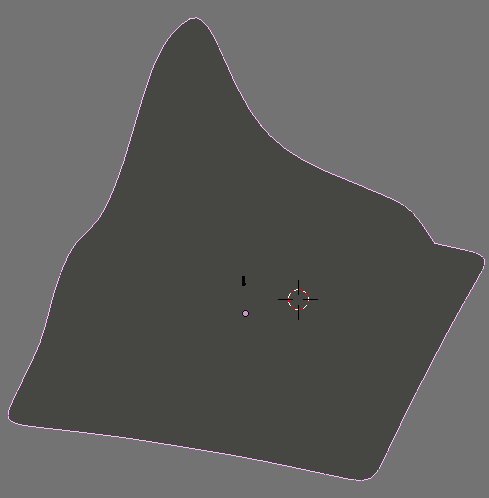
The terrain created for this Age will be a simple island. Use the dummy avatar as a reference from hereon. Make sure you delete it before final export (unless dummies are an integral part of your Age). If you want to keep the avatar, a workaround can be to assign it the "Region" type. To do so, select your dummy, click on the "Add Property" button in the logic panel (F4 to reveal it), then change the type to String, the name to "type" and the value to "region", to obtain this setting.
Now for the actual modelling:
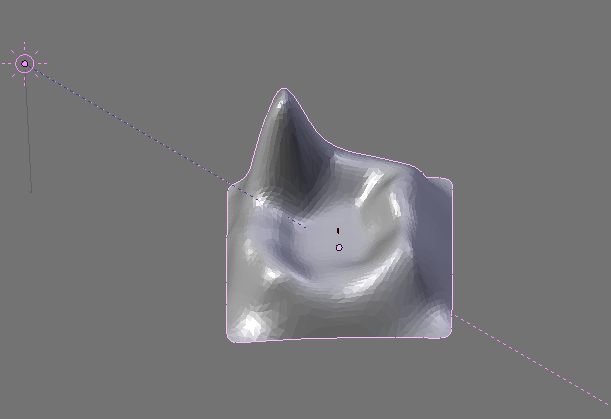
- Try to obtain something similar to the object to the right. For your information, this terrain was created in a few minutes by using a NURBS surface to edit the outline before converting it to a mesh. The terrain was rounded off using two layers of subsurf and a decimator (which are both modifiers that can be applied in the edit panel).
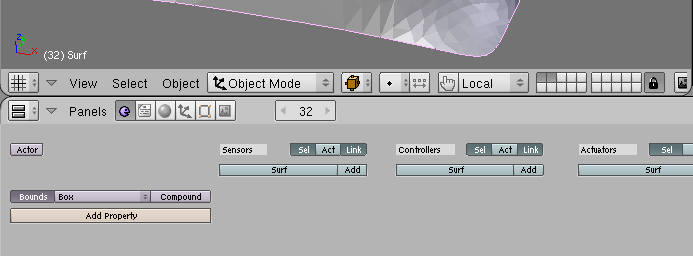
- To add physical collisions to your island, go to the Buttons window and select the logic button. You will see a button called Bounds. Pressing it will reveal another button next to it titled Box, as seen here. As it is, however, it is useless, as the collision mesh is the bounding box. Click Box to reveal four choices:
- Box: uses the object's bounding box (the smallest box that still encompasses the entire object).
- Sphere: uses the object's bounding sphere (the smallest sphere that still encompasses the entire object). In our case, the same problem as for the box applies.
- Convex Hull Polytope: uses the objects Convex Hull (the surface you would get if you were able to wrap it in shrinking foil). In our case, since the surface has a valley, it wouldn't be represented accurately by a convex hull, which would fill it up.
- Static Trianglemesh: copies the faces from the visible object to the physical mesh. In our case, this is exactly what is needed. Click on this option.
- If you were to link now (even though you can't, since no link-in point has been defined yet), you would see something like this: the Age looks completely flat because there is no sunlight, and thus no shadows. Add a sun and rotate it like so. Select the sun while holding Shift, then select the island, and finally press Ctrl-T. This will ensure your sun is tracking your island and always pointing towards its center, no matter its location. For future reference, when adding lights with ray shadow enabled, take care to keep the dist value below 100 or so, to prevent clipping or vanishing of shadows.
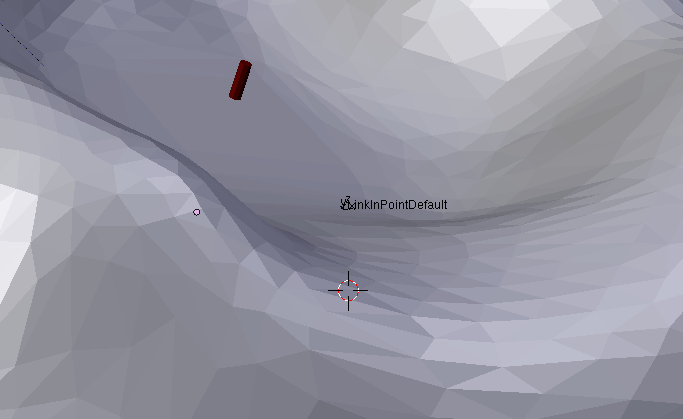
- Finally, before being able to link to your Age, you need to add a Linking Point to your Age. Each Age must have at least one called
LinkInPointDefault(which is the default point linked to). To place this link-in point, click on a location slightly above the place where you want the player to link to. Then click on Scripts -> Add -> PyPRP -> Create a New SpawnPoint. This will add a spawn point on layer 2 of your Age. You can move it to layer 1 by holding Shift and pressing the buttons for the layer of your choice. If you have it in layer 1 now, it should look something like this. It will automatically be named appropriately.

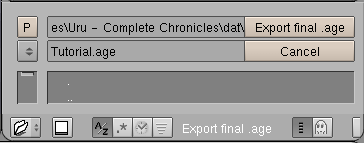
You can now export your Age for the first time. Save your file as a Tutorial.blend file under your Uru dat folder, then under File -> Export -> PyPRP select Generate Release (.age) and name it Tutorial.age, before clicking on "Export final .age". All files (.age, .prp, .fni and .sum) will be generated in the same folder as your Tutorial.blend file, which means you won't have to copy any files over your computer for now.

/link agefilename. Right now, your Age will look like the screenshot to the left, since it hasn't been textured yet. This is the next step.
Texturing
Under construction.
To make your age look more realistic, you'll have to texture it. For the purpose of this tutorial, your Age shall be given a rocky texture with a small patch of soil on the bottom.
UV Mapping
In order to texture your Age, you'll need to understand what UV mapping is. Basically, UV mapping consists of precisely assigning vertices or faces to parts of your texture. The coordinates that a vertex gets assigned on the texture are called U and V - hence the name "UV mapping".
- Note: in Uru, UV coordinates are set per vertex, whereas in Blender they are set per face (meaning that a vertex can have separate UV coordinates for each face that it's attached to). The plugin does accurately handle this (by duplicating vertices for each face that has different UV coordinates), so don't worry too much, but to avoid getting too many vertices duplicated, it's always best to have similar UV coordinates for as many vertices as possible.
Fortunately, Blender can automatically unwrap your island into convenient UV coordinates:
- If you are using Blender 2.45 or lower:
- Make one Blender window a UV/Image Editor window.
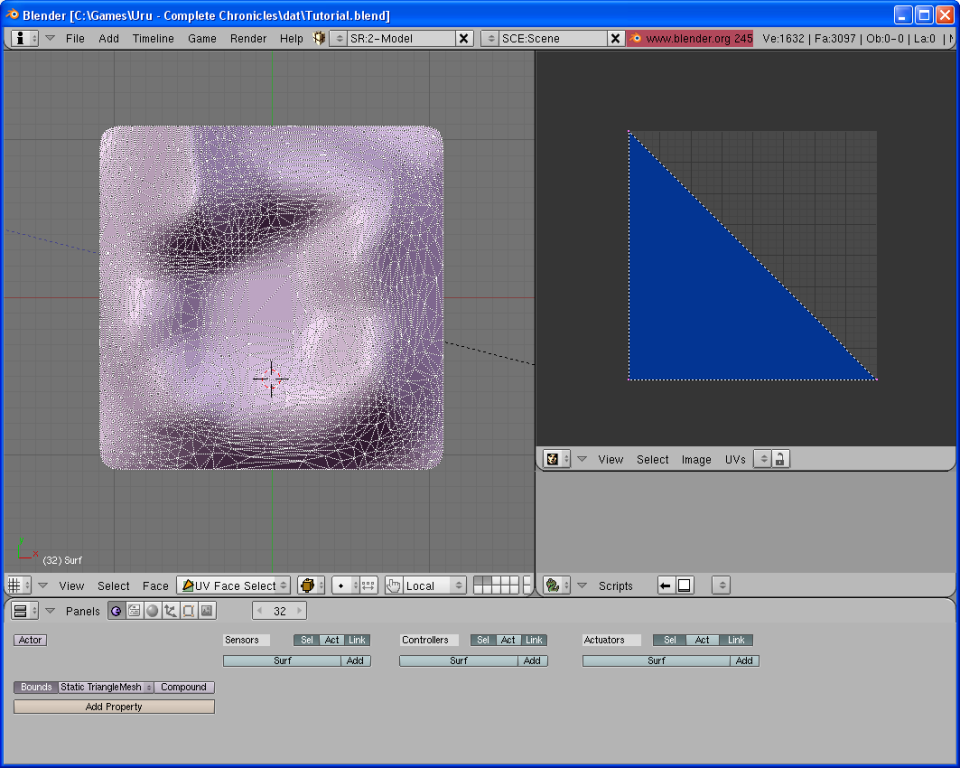
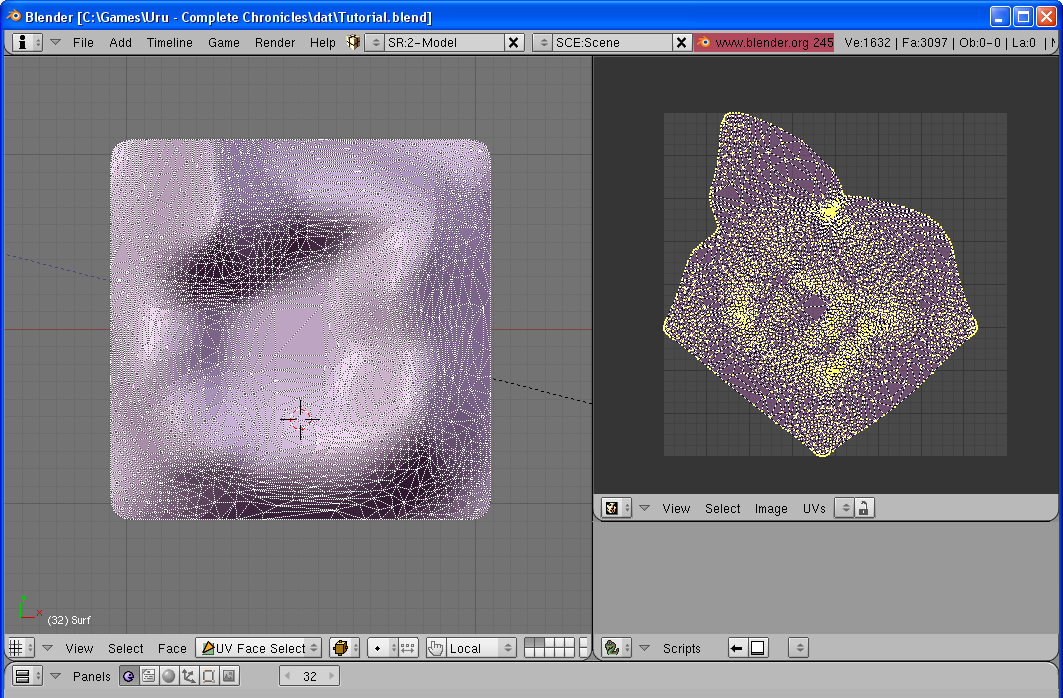
- Select your object (while in object mode) and press F to switch to UV editing mode. Don't forget to select all the faces by using the A key. It's best to use the view from straight above by pressing the 7 key on your numpad. Your window should now look like this; as you can see, the UV/Image Editor window shows the UV coordinates for each selected face.
- If you are using Blender 2.46 or higher:
- Go in object mode and select your object.
- Press Tab to go to edit mode.
Right now, all faces use the same part of the texture, which looks rather unsightly. Therefore, the next step is to have Blender "unwrap the texture":
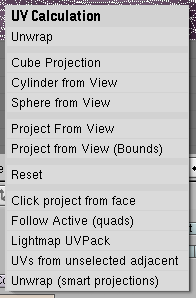
- Press the U key to bring up this pop-up menu.
- Select the topmost Unwrap option. Blender then tries to accurately map the surface to a flat sheet of texture, but at the same time it translates the relative size of the faces correctly to texture space (letting larger faces have a bigger part of the texture than smaller faces). The result should look something like this.
Adding a Rocky Texture
You can now start to texture your island with a rocky surface. Two textures, pictured to the right, will be used to texture the island.

Base Rock
The first texture will be applied as a basic terrain.
- Make a new material for the mesh, and add a texture to it; for convenience, call it Rock, for example.
- Set the color close to the color pictured in the above screenshot. Since it's a rock, you can also optionally let it have a bit of specularity by setting the specularity slider and the hardness slider.
- Now add the texture: go the textures panel and load the first rocky texture. Make it look something like this. By having the MipMap button pressed, PyPRP is told to make MipMaps (a set of continually smaller images used to render at greater distances). The Interpol button tells PyPRP to compress the texture.
- Right now, the texture encompasses the entire island, which doesn't look particularly good.
Rocky Detail
Adding a Patch of Soil
Adding Atmosphere
Under construction.
Adding Sounds
Under construction.
Adding Objects
Under construction.
Final Result
Under construction.