Korman:Logic Nodes
| This is a tutorial page. |
This tutorial will cover Blender's Node Editor and the basic functions of each type in Korman.
Introduction
Logic Nodes are Korman's replacement for the more cumbersome AlcScript. Instead of checking lines and lines of code, Korman ignores that in favor of a more simplified visual interface called nodes.
Setting Up
It's best to have a lot of space in your Blender window while working with your node trees. You can switch one of your windows to the Node Editor window.
Use the mouse to stretch the window as big as you like. Your other windows will be out of view, but you can always move things back.
First, click the + sign to start a new NodeTree. You can rename this tree to something unique.
Important: Click the F button next to the + sign or the node tree won't save to the blend file after you exit.
Click Add on the menu bar and choose the type of node you would like.
Types of Nodes
This section will go over the function of each type of logic node.
Responder Nodes
Responder nodes are where you want to start with your tree. They are essentially the "brain" of the node tree. Other nodes will stretch outward from them.
Responder State
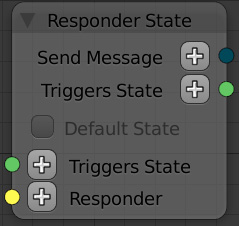
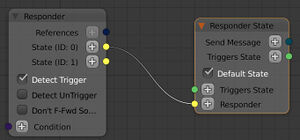
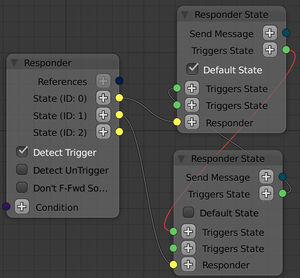
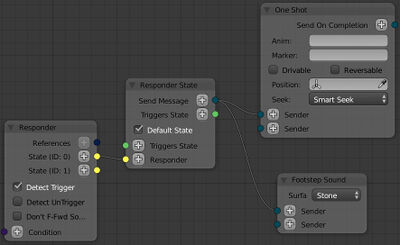
This is the node with which you want to start. You can use multiple states for your object, with one marked as your Default State, the state in which the object starts.
For example, you would have one responder state for a closed door to open, then another to close the open door. Which responder state you mark as default will determine if the door is open or closed when you first Link in.
Note: Only ONE responder state should have Default State checked or things won't work properly.
Responder
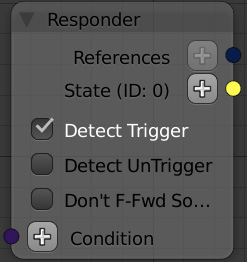
This node will tell URU that it needs to detect a clickable or a region sensor. Generally, Detect Trigger is the only thing checked.
It only needs to be connected to the Default State.
Detect UnTrigger will stop the responder to which it's connected.
Don't F-Fwd Sounds
Responder Command
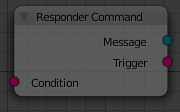
These nodes are used for every action you want URU to perform. You can connect multiple responder commands to each other, but you can only have one message connected to each.
With this method, you can cause actions to happen step-by-step instead of all at once.
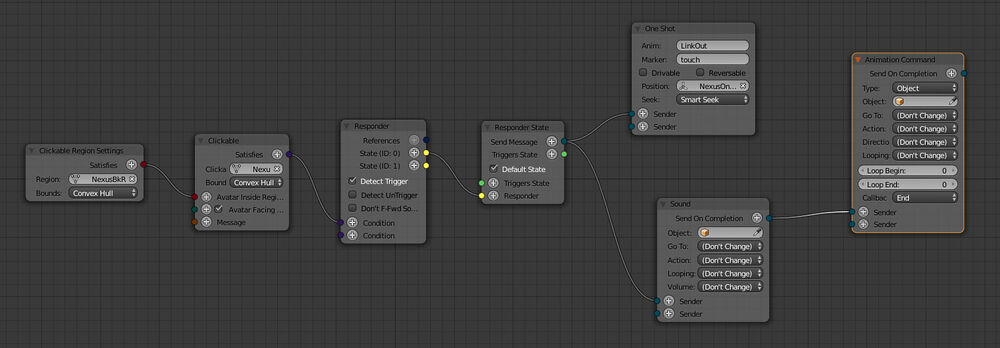
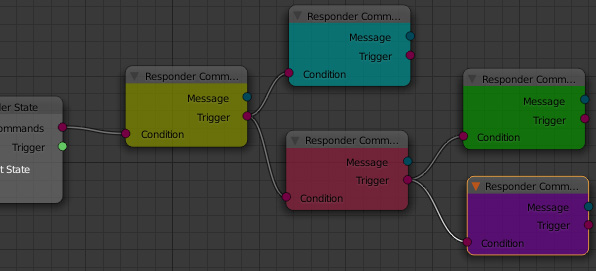
In this example, the message from the yellow responder command will happen first, then once it's complete, it will go the next steps connected to the cyan and red responder commands, then once those are complete, it will finally finish with the steps connected to the green and purple responder commands.
Responder Tree Examples
Message Nodes
Message nodes, each one connected to a responder command, will tell URU what action it should do.
Animation Messages
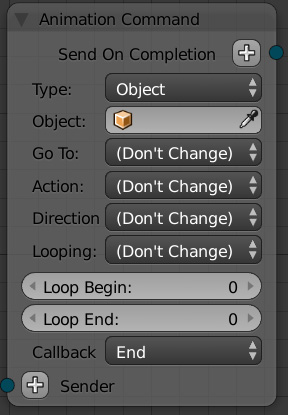
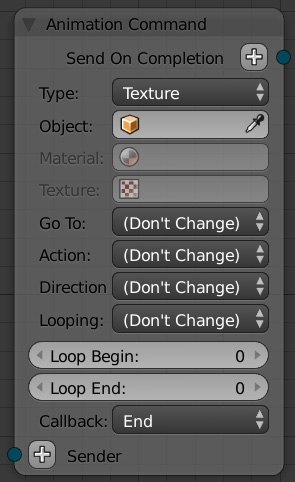
Using these will change the animation of a particular object or texture. Before wiring, be sure the object in question has an animation.
- Type - choose which kind of animation to trigger: object or texture
- Object - the modeled object that contains the animation.
- Material - if you choose texture for type, this tells which material has the texture with the animation you want.
- Texture - once the material is chosen, here you choose the texture that has the animation.
- Go To - tells the game where you want the animation to start. Don't Change will leave the animation wherever it last left off.
- Action - tells the game that you want to play, stop, toggle between start and stop, play to a certain frame, or play to a certain percentage of the animation.
- Direction - tells the game which way you want the animation to play: forward or backwards.
- Looping - tells the game whether you want to loop the animation after triggering it or not.
- Loop Begin - the first frame of the animation you'd like to play. This can be any frame within the animation if you don't want it to start at the very beginning.
- Loop End - the last frame of the animation you'd like to play. This can be any frame within the animation if you don't want it to stop at the very end.
- Callback - when the responder is notified. End is at the end of the action, Stop is when there's a message, and (None) doesn't tell the responder anything. Usually, End is the best option.
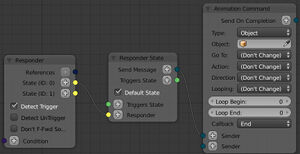
Example:
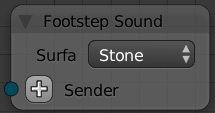
Footstep Sound
You can use this node if you would like to wire a footstep region manually. Alternately, you can also use a footstep modifier on your region.
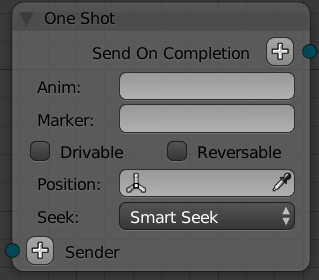
One Shot
A One Shot node is used to move the avatar to a specific point.
- Anim - the animation you would like the avatar to do. Check the list of avatar animations for the Name and Callback Marker of each.
- Example: DoorButtonTouch, InsertKiHand, etc.
- Marker - putting the Callback Marker here will cause the next series of responder commands to happen in the middle of the avatar animation. Leaving this blank will cause the commands to happen after the avatar animation is complete.
- Example 1: Putting InsertKiHand into both fields will cause an action to play mid-animation, such as the Nexus terminal symbol glowing when the KI is inserted.
- Example 2: Putting DoorButtonTouch into the Anim field but leaving the Marker field blank will make things function like a journey cloth (animation after the avatar is finished).
- Drivable - checking this lets the player keep control of the avatar during the One Shot. Needed for Reversable.
- Reversable - player can reverse the One Shot. Check this if you want the avatar to be able to "cancel" the One Shot when moved.
- Position - The name of the object to which the avatar will walk (usually an Empty).
- Seek - how the avatar makes its way to the One Shot. Warp will instantly place the avatar at the One Shot, Seek will cause the avatar to shuffle its way there, and Smart Seek will tell the engine to find the best path.
Example:
Conditions
These nodes are used to properly set up a clickable or region sensor.
Clickables
For various setups of clickables, see the associated tutorial.
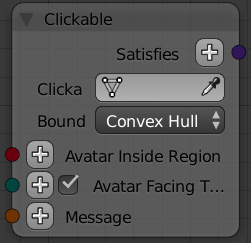
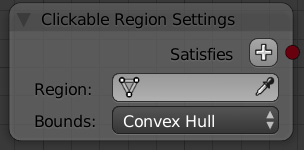
These nodes set an object up as a clickable.
The clickable node is set to the clickable object while the clickable region settings node is set to your clickable's region.
Your clickable node will be connected to your responder node while your clickable region settings node is connected to the clickable.
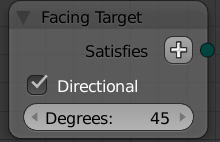
Facing Target
The facing target node can be attached to the clickable node. It tells the game that the avatar has to be facing the clickable at a certain angle in order for the hotspot to appear. This is useful if you have a lot of clickables in a small space.
Note 1: The recommended maximum angle is 57 degrees.
Note 2: The facing target node is optional. You can simply check the option on the clickable node for a default 45 degrees or leave it unchecked if you'd prefer the avatar can face any direction.
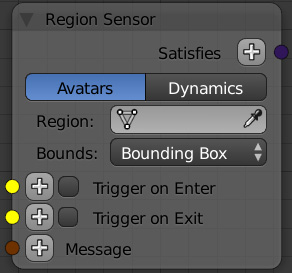
Region Sensor
These nodes set an object up as a region sensor, meaning it will trigger the responder when you enter and exit the region.
Prime examples include when an avatar walks up to an imager to post, or when the museum door in Ae'gura opens and closes.
The region sensor is set to the region you would like to enter or exit. Choosing Avatars will trigger the responder when an avatar enters the region while Dynamics will trigger the responder when a kickable enters the region.
For Bounds, Convex Hull is best for simpler shapes while Triange Mesh is for more complicated shapes.
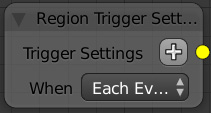
The region trigger settings tells the region what it needs to trigger enter or exit.
- Population will activate the responder when a certain number of avatars/kickables enter the region (number is set by the Threshold field).
- First Event will activate the responder when the first avatar/kickable enters the region, but not for subsequent avatars/kickables.
- Each Event will activate the responder when any avatar/kickable enters the region.
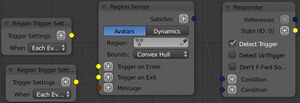
Note: the region trigger settings node is optional. You can simply check Trigger on Enter/Exit in the region sensor for a default of Each Event.
Example:
Avatar
These types of nodes cause the avatar to perform a certain action.
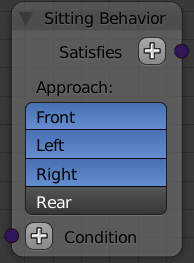
Sitting Behavior
This node will determine the directions from which an avatar can approach a sitting modifier.
For instructions on how to properly set up a sitting mod, please use the clickables tutorial.
Applying the Node Tree
Our final step will be to apply our node tree into the Age itself.
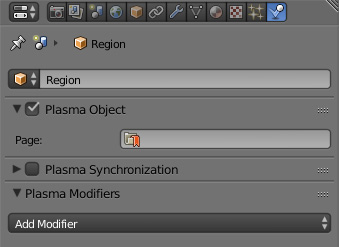
Select any object (usually one of the related objects works best, but any will do), press the Physics button in the Properties window.
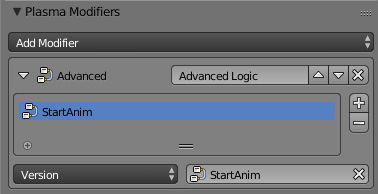
Next, click on Add Modifier and choose Advanced.
In the modifier that appears, click the + to add a new item. Double click on it to rename it.
In the bottom right, click on the field and choose the node tree you want to use.
In the Version drop down menu, you can choose specific versions of URU. It's best to leave this at default (all selected).
Your node tree logic should now export!

